The tradition of not discarding but finding a use for every piece of fabric dates back to times when a peasant woman had to sew everything herself – from clothes to curtains, tablecloths, and napkins. Everything in the home was handcrafted and decorated. It was then that the patchwork quilt, which we will describe in this article, began to take shape.
Revisiting Old Patchwork Quilting Techniques
Old methods of patchwork quilting, born out of necessity, are now experiencing a resurgence as a unique decorative solution. For craft enthusiasts, this is an opportunity to add a self-made, unique item to their home decor. Such items are always filled with the love, care, and attention of the maker, making each piece an exclusive extract of home comfort.
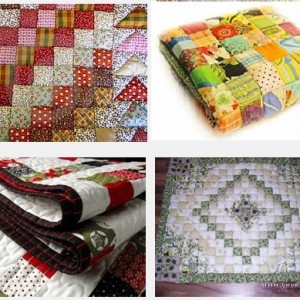
The charm of these items is what draws people to the art of patchwork quilting and the revival of other forgotten handicraft techniques from the past, now returning as useful hobbies and being improved upon in clubs and workshops.
Variety in Patchwork Quilting Techniques
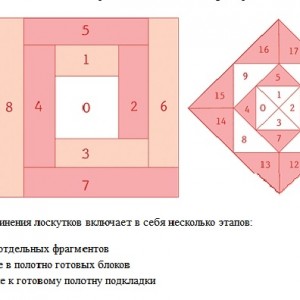
The technique of sewing quilts from patches is now very diverse. There are many different patchwork schemes, varying in complexity. The simplest techniques are accessible to any enthusiast, while some complex schemes can only be tackled by experienced craftsmen. These can range from simple squares to complex compositions with a thoughtful plot. This form of sewing allows the realization of the craftsperson’s fantasies, offering a space for everyone to find their unique style.
Popular Patchwork Quilting Techniques
One common ornament consists of hexagons of the same size and shape, known as the “Honeycomb” technique, with each decorative element comprising seven hexagons of different colors. All hexagons are hand-sewn together, starting from the edge and moving towards the junction. The products made entirely of such hexagons are quite striking, but even a single element can be used for decoration, such as an appliqué.
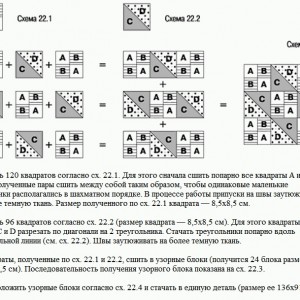
The “Plowed Field” technique makes a quilt look like a plowed field, using strips of fabric. The first step divides the field into three sections, with the boundaries of each section set at right angles to each other. Each section is then divided into parallel strips of arbitrary width, but the strips in each section are oriented differently. Starting with the longer strip, they are numbered, and strips with the same numbers are made of the same color. Following this scheme, the sections of the future “plowed field” are assembled from strips.
The “American Square” technique, also known as “Well,” “Log Cabin,” “Log House,” or “Labyrinth,” involves sewing colorful strips spirally around a bright small square.
The “Pineapple” scheme coincides with the “Well” but uses strips of two contrasting colors. “Checkerboard” is a technique where strips of fabric made from differently colored squares are first sewn together, and then these strips are used to assemble the cloth.
To start making a patchwork quilt, first create a sketch of the quilt using colored pencils on graph paper. Arrange squares and strips of different colors in various ways. The result of your searches and experiments will be the drawing of one section of the patchwork quilt.
Next, select the combination of section designs that will become the project for the entire quilt canvas. Once the design is finalized, you can start sewing the quilt.
First, you need fabric, lots of it, in various colors. Cotton fabric, curtain materials, and similar fabrics are very convenient. In short, use any fabric scraps you can find. In addition to fabric, since this is a quilt, you’ll need synthetic padding or batting. These are safe for allergy sufferers and eco-friendly, equally convenient to work with and to wash later. Next, prepare threads, needles, pins, an iron, scissors, cardboard, measuring tape, a pencil, and a sewing machine.
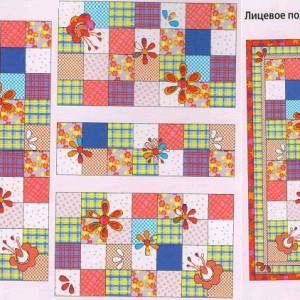
Assemble the sections from patches, iron the seams in one direction, and then sew the sections together, carefully ironing each seam.
To assemble the quilt, lay out the back fabric on a suitable surface, then place the synthetic padding or batting on top, and finally, add the patchwork canvas, securing all layers with pins. The last step is to sew the quilt together, working around the entire perimeter with a “groove” stitch type.
Handmade Patchwork Quilt Video Tutorials
Links to video tutorials on how to make a patchwork quilt by hand:
https://www.youtube.com/watch?v=H5wfnc4GmAo
In this article, we have endeavored to explain how to make a patchwork quilt by hand, with schemes we have tried to describe in as much detail as possible. Such a quilt will not only warm your body but also please your soul with the beauty of a handmade, unique item.


