With the onset of colder weather, car enthusiasts start thinking about heating their car seats. While buying heated seat covers or cushions is an option, they might not always fit well and can be uncomfortable. This article explores how to create your own heated car seats, which, though more complex than buying covers, is worth the effort.
Materials Needed for Installing Heated Car Seats
To install seat heating, you will need:
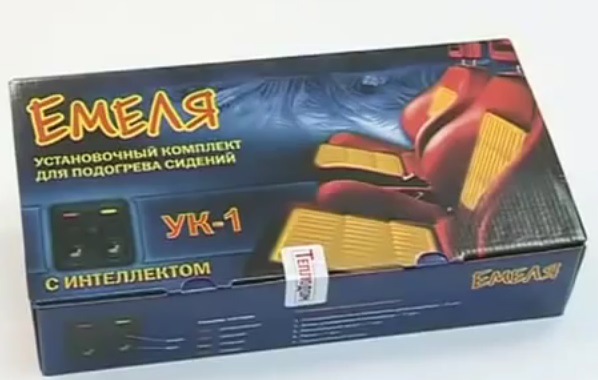
- A seat heating kit (e.g., ‘Emelya’ kit), costing approximately 2,500 rubles;
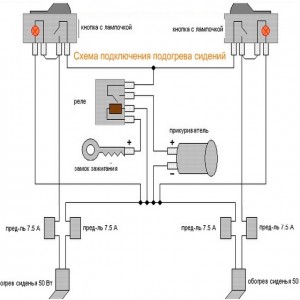
- Wires: About 6 meters of 2.5 mm multi-strand wire for the power cable, and two 2-meter pieces of 1.5 mm wire for control;
- A fuse connector and the fuse itself;
- 1.5 mm wire (control), 2 meters long;
- 6 mm terminals with ring connectors and male-female crimp connectors;
- M6 self-locking nuts;
- Corrugated tubing for wire routing, diameter 4.5-8 mm;
- Electrical tape;
- Plastic cable ties;
- Red LEDs;
- Heat-shrink tubing;
Also, various tools like screwdrivers, cutters, a drill, scissors and a knife, a file, wrenches.
Installation Process of DIY Heated Car Seats
For illustration, we take the example of installing seat heating in a BMW, which has a factory-installed pyrotechnic cartridge, airbags under the seat, and a battery in the trunk (not under the hood).
These factors slightly complicate the installation of heating.
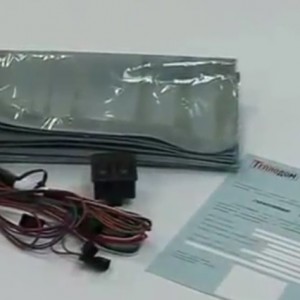
If we talk about the ‘Emelya’ kit for DIY seat heating installation, it comes with a connection diagram that should raise no questions.

First, remove the seats from their mounts (as heating is installed inside the seats). Be especially careful if your car has airbags installed in the seats to avoid damaging the pyrotechnic cartridge. It’s better to consult the technical documentation of your specific car model for instructions on removing and installing the seats.
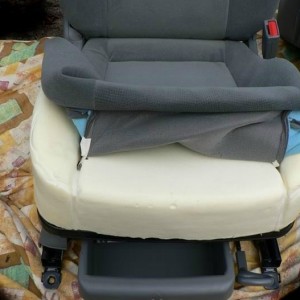
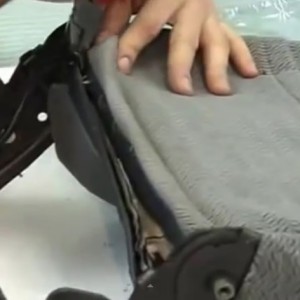
Next, disassemble the seats, i.e., remove the upholstery from the hooks, cut off the tie rings with cutters (later, replace these rings with plastic cable ties).
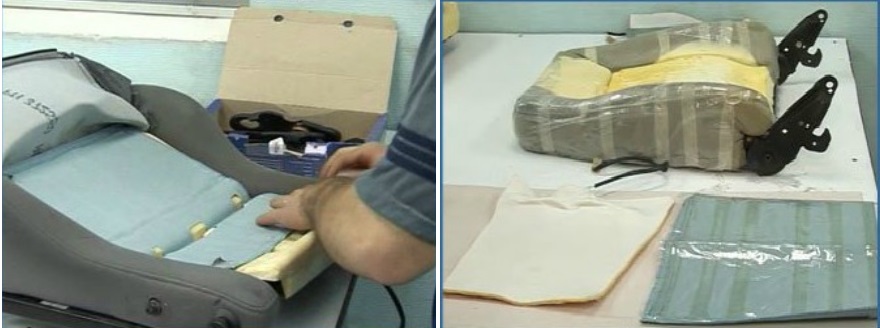
Place the heating mats on the seat, fit them, and mark with a marker where cuts are needed to attach the mat to the seat frame and upholstery. Do not cut the heating wires.
After making the cuts, secure the heating mats to the upholstery using plastic cable ties. Run the power cable of the heating mat through the foam of the seat, preferably towards the back, near the armrest. It’s wise to route this wire in a PVC corrugated tube.
Often the standard wires are too short and need to be extended with similar wire, solder the joint, and place the wire in corrugated tubing.
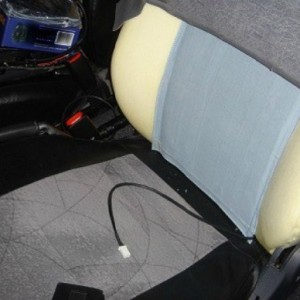
Draw power from the power cable through the fuse and connect it to the positive terminal of the battery. If the battery is in front, this is simpler, but if it’s in the trunk, you’ll need to remove the rear seats to route the cable in the cabin, under the carpet. Remove the positive terminal or disconnect the fuse before continuing.
Hide the wires from the controllers to the heating elements in corrugated tubing and neatly route them under the carpets. Remember, do not pull the wire tight; leave some slack in case the seat moves back.
Install the controllers where convenient, as they might not fit in the standard location on the console. If you buy factory heating control buttons, they may cost more than the entire kit you are installing.
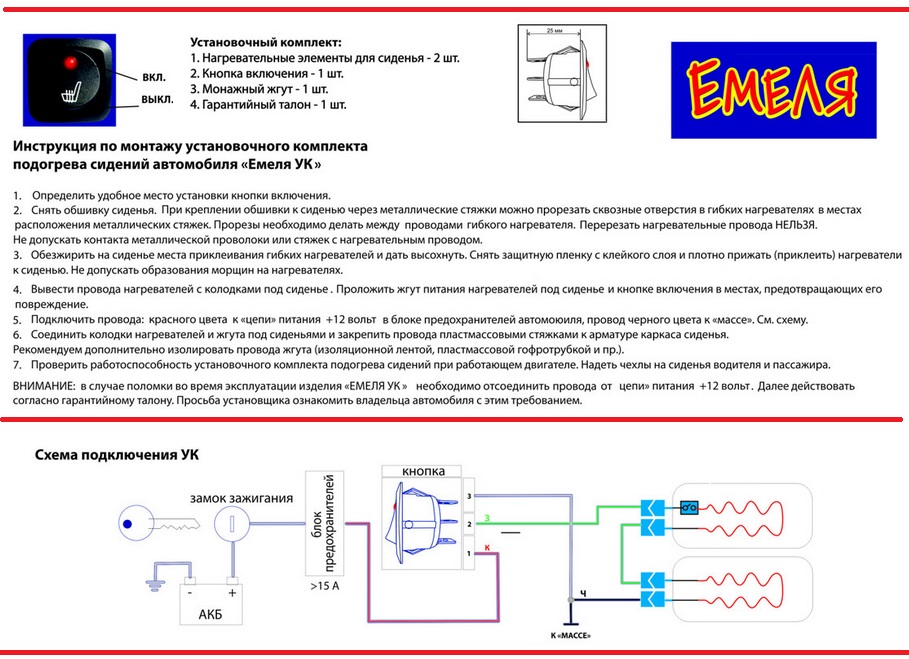
Finally, connect the relay from the seat heating kit with a positive wire to the ignition lock. Carefully follow the instructions and the connection diagram to the ignition lock. Though the contact numbers may vary across vehicles, solder the wire to the contact that gets +12 volts at the №2 position of the ignition lock.
Now, trim the wires connected to the relay (control and power to the heating mats), leaving a small margin, crimp (or solder) into ‘female’ connectors, put on heat-shrink tubing, and connect to the relay. Connect the ground wire to the closest point on the body of the car.
By doing a bit of work, you can equip your car with DIY heated seats and not depend on the cold outside your vehicle. This task is not complicated for those who can handle basic tools.
How to Make DIY Heated Car Seats – Videos
https://www.youtube.com/watch?v=VUbl0jy2rqw