Purchasing a ready-made press can be quite expensive, leading to the decision to create a homemade press using a car jack. Additionally, this guide will cover the fabrication of a bearing puller specifically for this press. While the press construction is straightforward, the design of the puller will require some creativity as pre-made options are scarce.
Step-by-Step Process of Building the Press
To construct the devices, you’ll need to acquire:
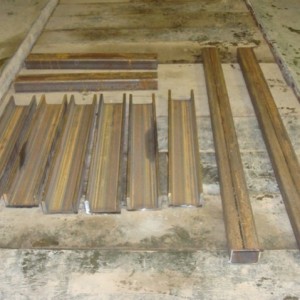
- Channel number 8, 3 meters long (8 cm width). It’s easier to cut it into 50 cm pieces in advance.
- Rectangular tube 4×6 cm, also 3 meters. Again, best to cut into two 1-meter pieces and two 50 cm pieces. The total cost of the tube and channel, including cutting, is about 33 USD.
- A 12-ton bottle jack, costing approximately 31 USD.
- Two 30 cm door springs (to be later cut down to 20 cm) for 2.6 USD.
Hardware for the Bearing Puller:
- A small two-arm puller, 3.7 USD.
- M16 1000 mm studs – 2 pieces.
- An M8 1000 mm stud – 1 piece.
- Tall M16 nuts – 4 pieces.
- The total cost of the hardware is around 12.2 USD.
Additionally, for creating the homemade press from a jack, we’ll use:
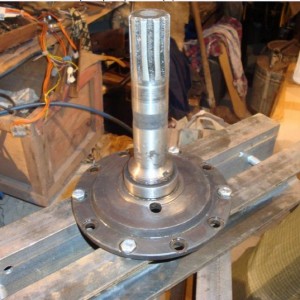
- A hub mushroom with shifted splines (unfit for use).
- A 25x25x0.8 cm plate.
- 0.4×4 cm strips – 4 pieces of 60 mm each.
- 50×50 angle – 2 pieces of 30 cm each.
- 25×25 angle – 2 pieces of 5 cm each.
- M8 nuts – 4 pieces.
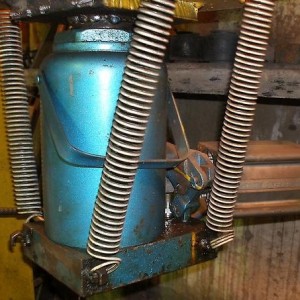
Here’s what the final assembly should look like. The jack is not permanently attached, meaning it can be easily removed and used for other purposes. The jack’s height is 23 cm:
Further Details and Final Assembly
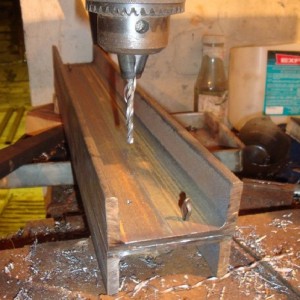
Drilling of the channels should be done in pairs, starting with a 0.4 cm diameter, aligning the holes using a pin, then moving to 1.25 cm.
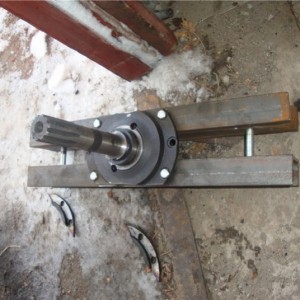
Attach the hub mushroom using 8×30 mm bolts. Thread cutting can be done in the channel or on the nut:
Now, trim any excess material:
Next, adjust the spring length from the original 30 cm (excluding bent coils) to 20 cm.
Finally, after drilling all the necessary holes, it’s time to weld the “legs”. The hooks on the puller: legs that are welded onto the tall M16 nuts:
Visual Guide and Final Remarks
Here’s how the puller looks:
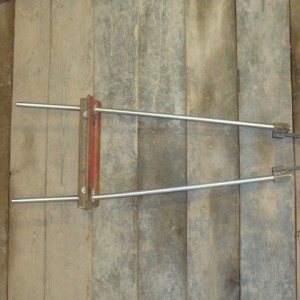
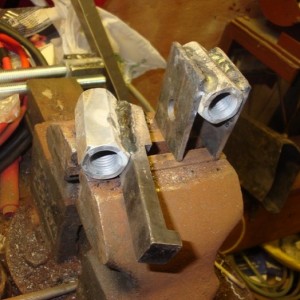
The top of the puller, including two 40x4x60 strips and a tall M16 nut, is ready for welding:
Here are the top and bottom of the puller after welding:
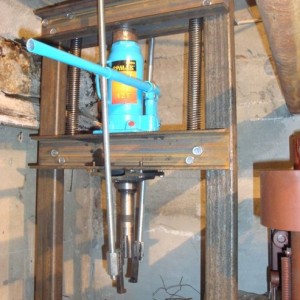
Photo of a differential clamped in the puller and the process of pressing a bearing:
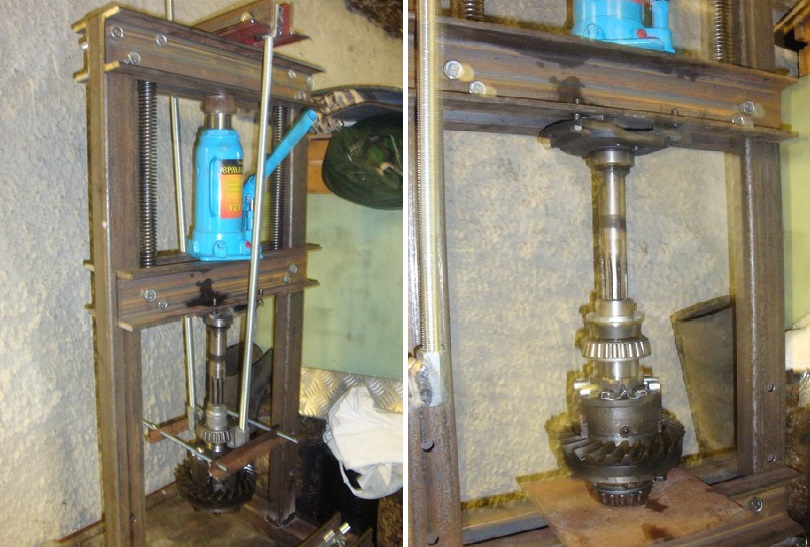
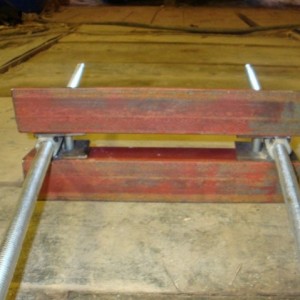
The position of the lower support, consisting of two channels, can be set at 10 cm intervals (3 positions).
And there you have it, your DIY hydraulic press from a jack is ready to use.
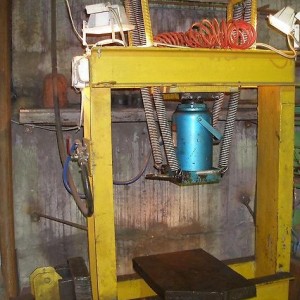
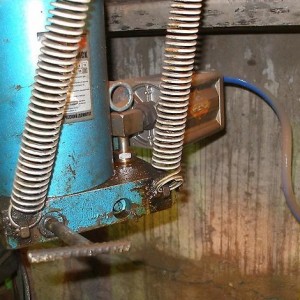
Another Interesting Solution for Attaching Springs to the Jack
Video Overview of the Completed DIY Hydraulic Press
https://www.youtube.com/watch?v=9Nu58j8fEqw