The arrival of the autumn-winter season often worsens road conditions, with snow, mud, and icy roads leading to reduced tire grip and poor vehicle control. As you can’t exactly fit tracks on a regular car, an alternative method has long been invented to improve vehicle traction.
This article will guide you on how to make robust anti-skid chains with your own hands, enabling you to drive safely even on roads covered in wet snow.

An anti-skid chain is a flexible structure made of chains or sturdy reinforced wire, with all parts connected to uniformly wrap around the tire.
The design consists of two longitudinal ropes (outer and inner) around the tire’s rim, connected by cross elements made of chain segments or ‘ground grippers’ crafted from rubber.
Anti-skid chains vary in their ‘pattern,’ enabling the tires to firmly grip any road surface. There are three types of anti-skid chains:
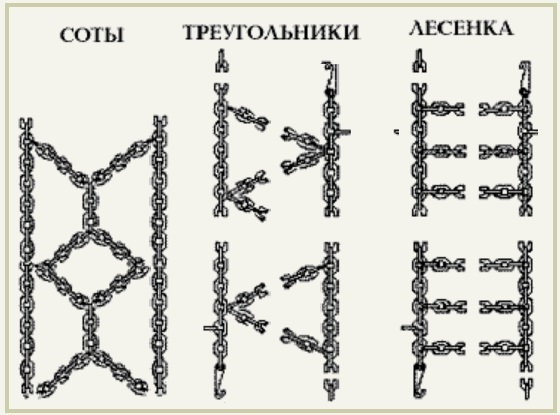
- Ladder;
- Diamond;
- Honeycomb.
All types of chains serve their function in combating skidding, each with its pros and cons, but this article will describe the ‘ladder’ design as it is the easiest to make yourself.
This type of anti-skid chain consists of six different elements, connected by binding rings:
- Longitudinal branches;
- Cross branches;
- Tail branches;
- Locking hook;
- Locking claw;
- Locking ring.
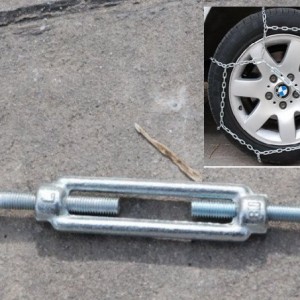
To prepare for making such a chain, you need hooks (32 pcs), 15 meters of chain with a bar diameter of four to five millimeters, and two tensioning devices.
How to Make Anti-Skid Chains Yourself
Cut four segments from the chain, each with 83 links, to be the longitudinal branches of the chain. For cross branches, cut 16 segments of 13 links each. Then, proceed to connect the pieces of the chain.
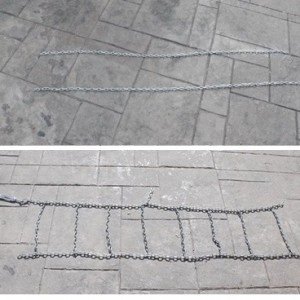
Attach the first cross fragment to the sixth link of both longitudinal chains, then attach cross branches at every tenth link, and the last fragment at the 12th link. Connect the cross branches to the longitudinal ones using rings or hooks.
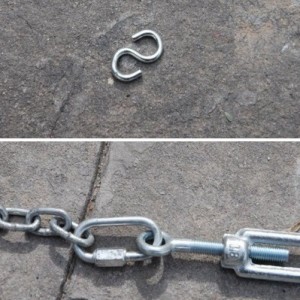
Put 5-mm diameter carabiners at the ends of the longitudinal chain segments. After the fourth cross branch, attach a five-link chain segment to one of the longitudinal branches. To the free end of this fragment, attach a tensioning device with a carabiner, and to the other end of this device, slip a hook.
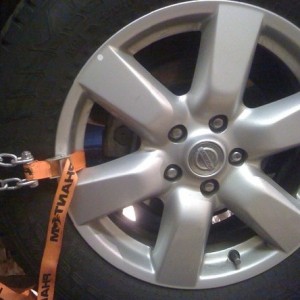
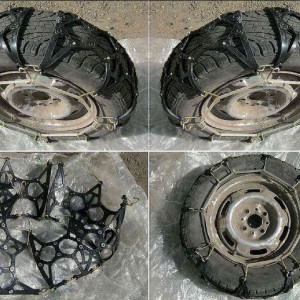
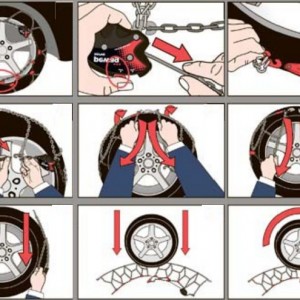
How to Mount Anti-Skid Chains on Tires
Now that the chains are ready, you can fit them onto your car’s tires and test them. Mounting anti-skid chains on the driving wheels can be done in one of two ways: with or without jacking up the car.
How to Install Chains Without Jacking Up the Car
- Align the anti-skid chain against the tire, ensuring the chain links are not twisted;
- Lay the chains on the road and drive the driving wheels over them;
- Secure the vehicle so it cannot inadvertently start moving;
- Fit the chains onto the wheel so that the locking ring and claw are on the outer side of the wheel;
- Attach the locking hook from the inside of the wheel to any link on the tail branch;
- Spread out the cross fragments evenly around the tire circumference;
- Thread a tail hook through one of the links at the end of the tail fragment;
- Turn the locking claw towards the locking ring;
- Slide the locking ring into the slot of the locking claw;
If you see that the chain needs further tightening, reattach the locking hook to the following links of the tail branch.
Ensure that the longitudinal and cross fragments tightly wrap around the wheel.
Method with Jacking Up the Car
- Secure the vehicle with the handbrake;
- Place stops under the front wheels of the car;
- Lift the wheel off the road by 2-3 centimeters with a jack;
- Fit the chain onto the wheel, as described in the previous method.
- Remove the device from the wheel in reverse order.
Now, you know how to make anti-skid chains yourself and how to install them on your car’s wheels. We hope this article helps you face off-road conditions and bad weather fully prepared.
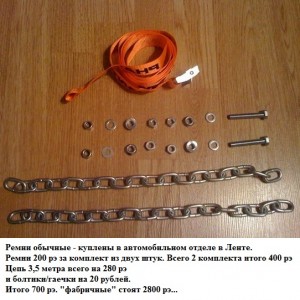
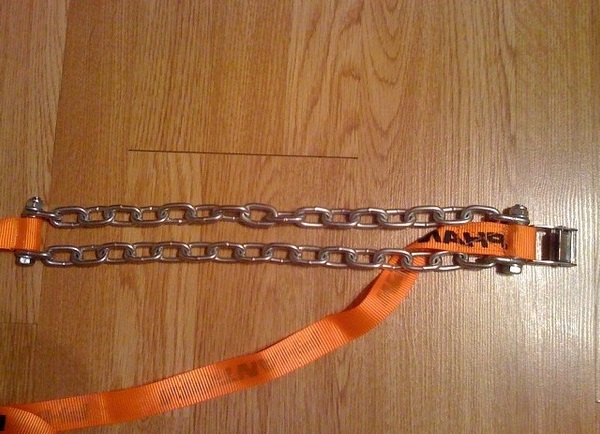
Homemade Anti-Skid Chains – The Simplest Option